Gallery:Karl Pilkington: Difference between revisions
No edit summary |
No edit summary |
||
| (12 intermediate revisions by 6 users not shown) | |||
| Line 1: | Line 1: | ||
<gallery> | <gallery> | ||
Image: | Image:HBO4.jpg|[[Animated Podcast|HBO Animation]] Promo | ||
Image:HBO5.jpg|[[Animated Podcast|HBO Animation]] Promo | |||
Image:HBO6.jpg|[[Animated Podcast|HBO Animation]] Promo | |||
Image:HBO7.jpg|[[Animated Podcast|HBO Animation]] Promo | |||
</gallery> | |||
*'''''Back to:''''' ''[[Gallery|The Gallery]]'' | |||
<gallery> | |||
Image:Karl_TheFridge.jpg|Karl and the fridge | |||
Image:Karl_Testicle_Ears1.jpg|Inspired by [[Podcast_Series_3#Episode_5|Podcast Series 3, Episode 5]] (created by [http://www.pilkipedia.co.uk/forum/profile.php?mode=viewprofile&u=730 Honcho] ) | Image:Karl_Testicle_Ears1.jpg|Inspired by [[Podcast_Series_3#Episode_5|Podcast Series 3, Episode 5]] (created by [http://www.pilkipedia.co.uk/forum/profile.php?mode=viewprofile&u=730 Honcho] ) | ||
| Line 19: | Line 27: | ||
<gallery> | <gallery> | ||
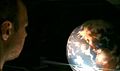
Image:ZooKarl.jpg|From ''[[ | Image:ZooKarl.jpg|From ''[[3_Minute_Wonder#Episode_4:_Nature|3 Minute Wonder]]'' | ||
Image:Bedkarl3.jpg|From ''[[ | Image:Bedkarl3.jpg|From ''[[3_Minute_Wonder#Episode_3:_Health|3 Minute Wonder]]'' | ||
Image:Bedkarl2.jpg|From ''[[ | Image:Bedkarl2.jpg|From ''[[3_Minute_Wonder#Episode_3:_Health|3 Minute Wonder]]'' | ||
Image:Bedkarl1.jpg|From ''[[ | Image:Bedkarl1.jpg|From ''[[3_Minute_Wonder#Episode_3:_Health|3 Minute Wonder]]'' | ||
</gallery> | </gallery> | ||
*'''''Back to:''''' ''[[Gallery|The Gallery]]'' | *'''''Back to:''''' ''[[Gallery|The Gallery]]'' | ||
| Line 28: | Line 36: | ||
<gallery> | <gallery> | ||
Image:3minwonder1.01.jpg|From ''[[ | Image:3minwonder1.01.jpg|From ''[[3_Minute_Wonder#Episode_1:_Life|3 Minute Wonder]]'' | ||
Image:3minwonder2.02.jpg|From ''[[ | Image:3minwonder2.02.jpg|From ''[[3_Minute_Wonder#Episode_2:_Holidays|3 Minute Wonder]]'' | ||
Image:3minwonder2.03.jpg|From ''[[ | Image:3minwonder2.03.jpg|From ''[[3_Minute_Wonder#Episode_2:_Holidays|3 Minute Wonder]]'' | ||
Image:3minwonder2.04.jpg|From ''[[ | Image:3minwonder2.04.jpg|From ''[[3_Minute_Wonder#Episode_2:_Holidays|3 Minute Wonder]]'' | ||
</gallery> | </gallery> | ||
*'''''Back to:''''' ''[[Gallery|The Gallery]]'' | *'''''Back to:''''' ''[[Gallery|The Gallery]]'' | ||
| Line 67: | Line 75: | ||
</gallery> | </gallery> | ||
*'''''Back to:''''' ''[[Gallery|The Gallery]]'' | *'''''Back to:''''' ''[[Gallery|The Gallery]]'' | ||
<gallery> | |||
Image:KPCultureShow1.jpg|From The Culture Show, October 2007 | |||
Image:KPCultureShow2.jpg|From The Culture Show, October 2007 | |||
Image:KPCultureShow3.jpg|From The Culture Show, October 2007 | |||
</gallery> | |||
*'''''Back to:''''' ''[[Gallery|The Gallery]]'' | |||
<gallery> | |||
Image:TSOTRKarl3.jpg|From [[This Side of the Truth]] | |||
Image:Cavemanc2.jpg|From [[This Side of the Truth]] | |||
Image:Mainpgpic.jpg|From [[This Side of the Truth]] | |||
</gallery> | |||
*'''''Back to:''''' ''[[Gallery|The Gallery]]'' | |||
<gallery> | |||
Image:Worldofkp uk.jpg|Cover of [[The World Of Karl Pilkington]] | |||
Image:Happyslappedcover.jpg|Cover of [[Happyslapped By A Jellyfish]] | |||
Image:Karlology.jpg|Cover of [[Karlology]] | |||
Image:Happyslapped.jpg|Karl working on Happyslapped | |||
</gallery> | |||
*'''''Back to:''''' ''[[Gallery|The Gallery]]'' | |||
<gallery> | |||
Image:Pilkingtonfilesframe.png|From The Pilkington Files | |||
Image:News Cultureshow.jpg| | |||
Image:Ep1 karlandbod.jpg|Karl and [[Bod]] | |||
Image:KPwithsign.jpg|Karl endorses Pilkipedia | |||
</gallery> | |||
*'''''Back to:''''' ''[[Gallery|The Gallery]]'' | |||
<gallery> | |||
Image:SatisfiedFool.jpg|From [[Satisfied Fool]] | |||
Image:Satisfied Fool-Karl Pilkington School Photo.jpg|From [[Satisfied Fool]] | |||
Image:Satisfied Fool-Karl Kettle.jpg|From [[Satisfied Fool]] | |||
Image:Satisfied Fool-Karl.jpg|From [[Satisfied Fool]] | |||
Image:Satisfied Fool-Karl Post Mensa Test.jpg|From [[Satisfied Fool]] | |||
Image:Satisfied Fool-Karl 2.jpg|From [[Satisfied Fool]] | |||
Image:Satisfied Fool-Karl by the sea.jpg|From [[Satisfied Fool]] | |||
Image:Satisfied Fool-Karl walking down the street.jpg|From [[Satisfied Fool]] | |||
</gallery> | |||
*'''''For more images go to:''''' ''[[Gallery:Karl Pilkington: Satisfied Fool]]'' | |||
<gallery> | |||
Image:Karlpilkington.jpg | |||
Image:Image.jpg | |||
Image:KPmainpg.jpg | |||
Image:K3mp.jpg | |||
</gallery> | |||
*'''''Back to:''''' ''[[Gallery|The Gallery]]'' | |||
<gallery> | |||
Image:Karl Mainpage128px.png | |||
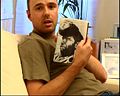
Image:KarlwithFreaks.jpg|Karl and the book, Freaks | |||
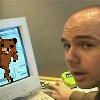
Image:Karlcompbear.jpg | |||
Image:Karl&boiler.jpg|Karl and his boiler | |||
</gallery> | |||
*'''''Back to:''''' ''[[Gallery|The Gallery]]'' | |||
<gallery> | |||
Image:TSOTTKarl1.jpg | |||
Image:Karlandnihal.jpg | |||
Image:3minwonder2.03.jpg | |||
Image:Karl screengrab.jpg | |||
</gallery> | |||
*'''''Back to:''''' ''[[Gallery|The Gallery]]'' | |||
<gallery> | |||
Image:Jujzs1.jpg | |||
Image:KPcultureshowART.jpg | |||
Image:KPinExtras2.jpg | |||
Image:Newkarl.jpg | |||
</gallery> | |||
*'''''Back to:''''' ''[[Gallery|The Gallery]]'' | |||
<gallery> | |||
Image:Karl mainpage.jpg | |||
Image:News Karl TheTimes.jpg | |||
Image:Videopodcast9.jpg | |||
Image:Videopodcast7.jpg | |||
Image:Karlpaste2.jpg | |||
Image:Karlpaste1.jpg | |||
Image:Karlpaste3.jpg | |||
</gallery> | |||
| Line 73: | Line 175: | ||
*[[Gallery:Stephen Merchant|Stephen Merchant Pictures]] | *[[Gallery:Stephen Merchant|Stephen Merchant Pictures]] | ||
*[[Gallery:Ricky Gervais|Ricky Gervais Pictures]] | *[[Gallery:Ricky Gervais|Ricky Gervais Pictures]] | ||
*[[Gallery:Ricky, Steve, and Karl|Ricky, Steve, and Karl Pictures]] | |||
[[Category:Karl Pilkington]] | |||
[[Category:Galleries]] | |||
Latest revision as of 23:50, 19 July 2011
-
HBO Animation Promo
-
HBO Animation Promo
-
HBO Animation Promo
-
HBO Animation Promo


- Back to: The Gallery
-
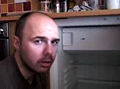
Karl and the fridge
-
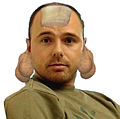
Inspired by Podcast Series 3, Episode 5 (created by Honcho )
-
Inspired by Podcast Series 3, Episode 5 (created by bushwod )
-
Karl meets our very own jizzmac


- Back to: The Gallery
-

From Sunday Telegraph (17 Sept 2006)
-
From Sunday Telegraph (17 Sept 2006)
-
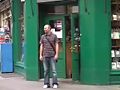
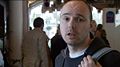
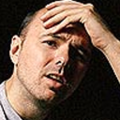
Karl on Flipside TV
-
Karl on Flipside TV. Again.


- Back to: The Gallery
-
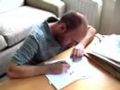
From 3 Minute Wonder
-
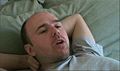
From 3 Minute Wonder
-
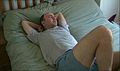
From 3 Minute Wonder
-
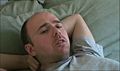
From 3 Minute Wonder


- Back to: The Gallery
-
From 3 Minute Wonder
-
From 3 Minute Wonder
-

From 3 Minute Wonder
-
From 3 Minute Wonder


- Back to: The Gallery
-
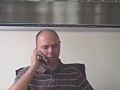
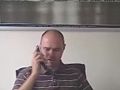
From the ninth Video Podcast
-
From the seventh Video Podcast
-
From the first Video Podcast
-
From the Politics DVD


- Back to: The Gallery
-
From Ricky Gervais' Politics DVD
-
From Ricky Gervais' Politics DVD
-

From Ricky Gervais' Politics DVD
-
From Ricky Gervais' Politics DVD


- Back to: The Gallery
-

From the Fourteenth Video Podcast
-

From the Fourteenth Video Podcast
-
From the Fourteenth Video Podcast
-
From the Fourteenth Video Podcast


- Back to: The Gallery
-
From the Fifteenth Video Podcast
-
From the Fifteenth Video Podcast
-
From the Fifteenth Video Podcast
-
From the Fifteenth Video Podcast


- Back to: The Gallery
-
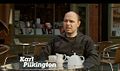
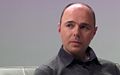
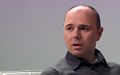
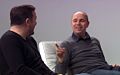
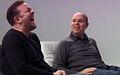
From The Culture Show, October 2007
-
From The Culture Show, October 2007
-
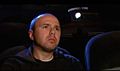
From The Culture Show, October 2007


- Back to: The Gallery


- Back to: The Gallery
-
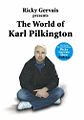
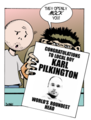
Cover of The World Of Karl Pilkington
-
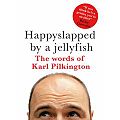
Cover of Happyslapped By A Jellyfish
-

Cover of Karlology
-
Karl working on Happyslapped


- Back to: The Gallery
-
From The Pilkington Files
-
-

Karl and Bod
-
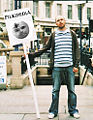
Karl endorses Pilkipedia


- Back to: The Gallery
-
From Satisfied Fool
-
From Satisfied Fool
-
From Satisfied Fool
-
From Satisfied Fool
-
From Satisfied Fool
-
From Satisfied Fool
-
From Satisfied Fool
-
From Satisfied Fool


- For more images go to: Gallery:Karl Pilkington: Satisfied Fool


- Back to: The Gallery
-
-
Karl and the book, Freaks
-
-
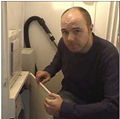
Karl and his boiler


- Back to: The Gallery


- Back to: The Gallery


- Back to: The Gallery


